
Hand Lettering Tips for Beginners
I KNOW YOU’RE EAGER TO GET STARTED, SO LET’S JUMP IN.
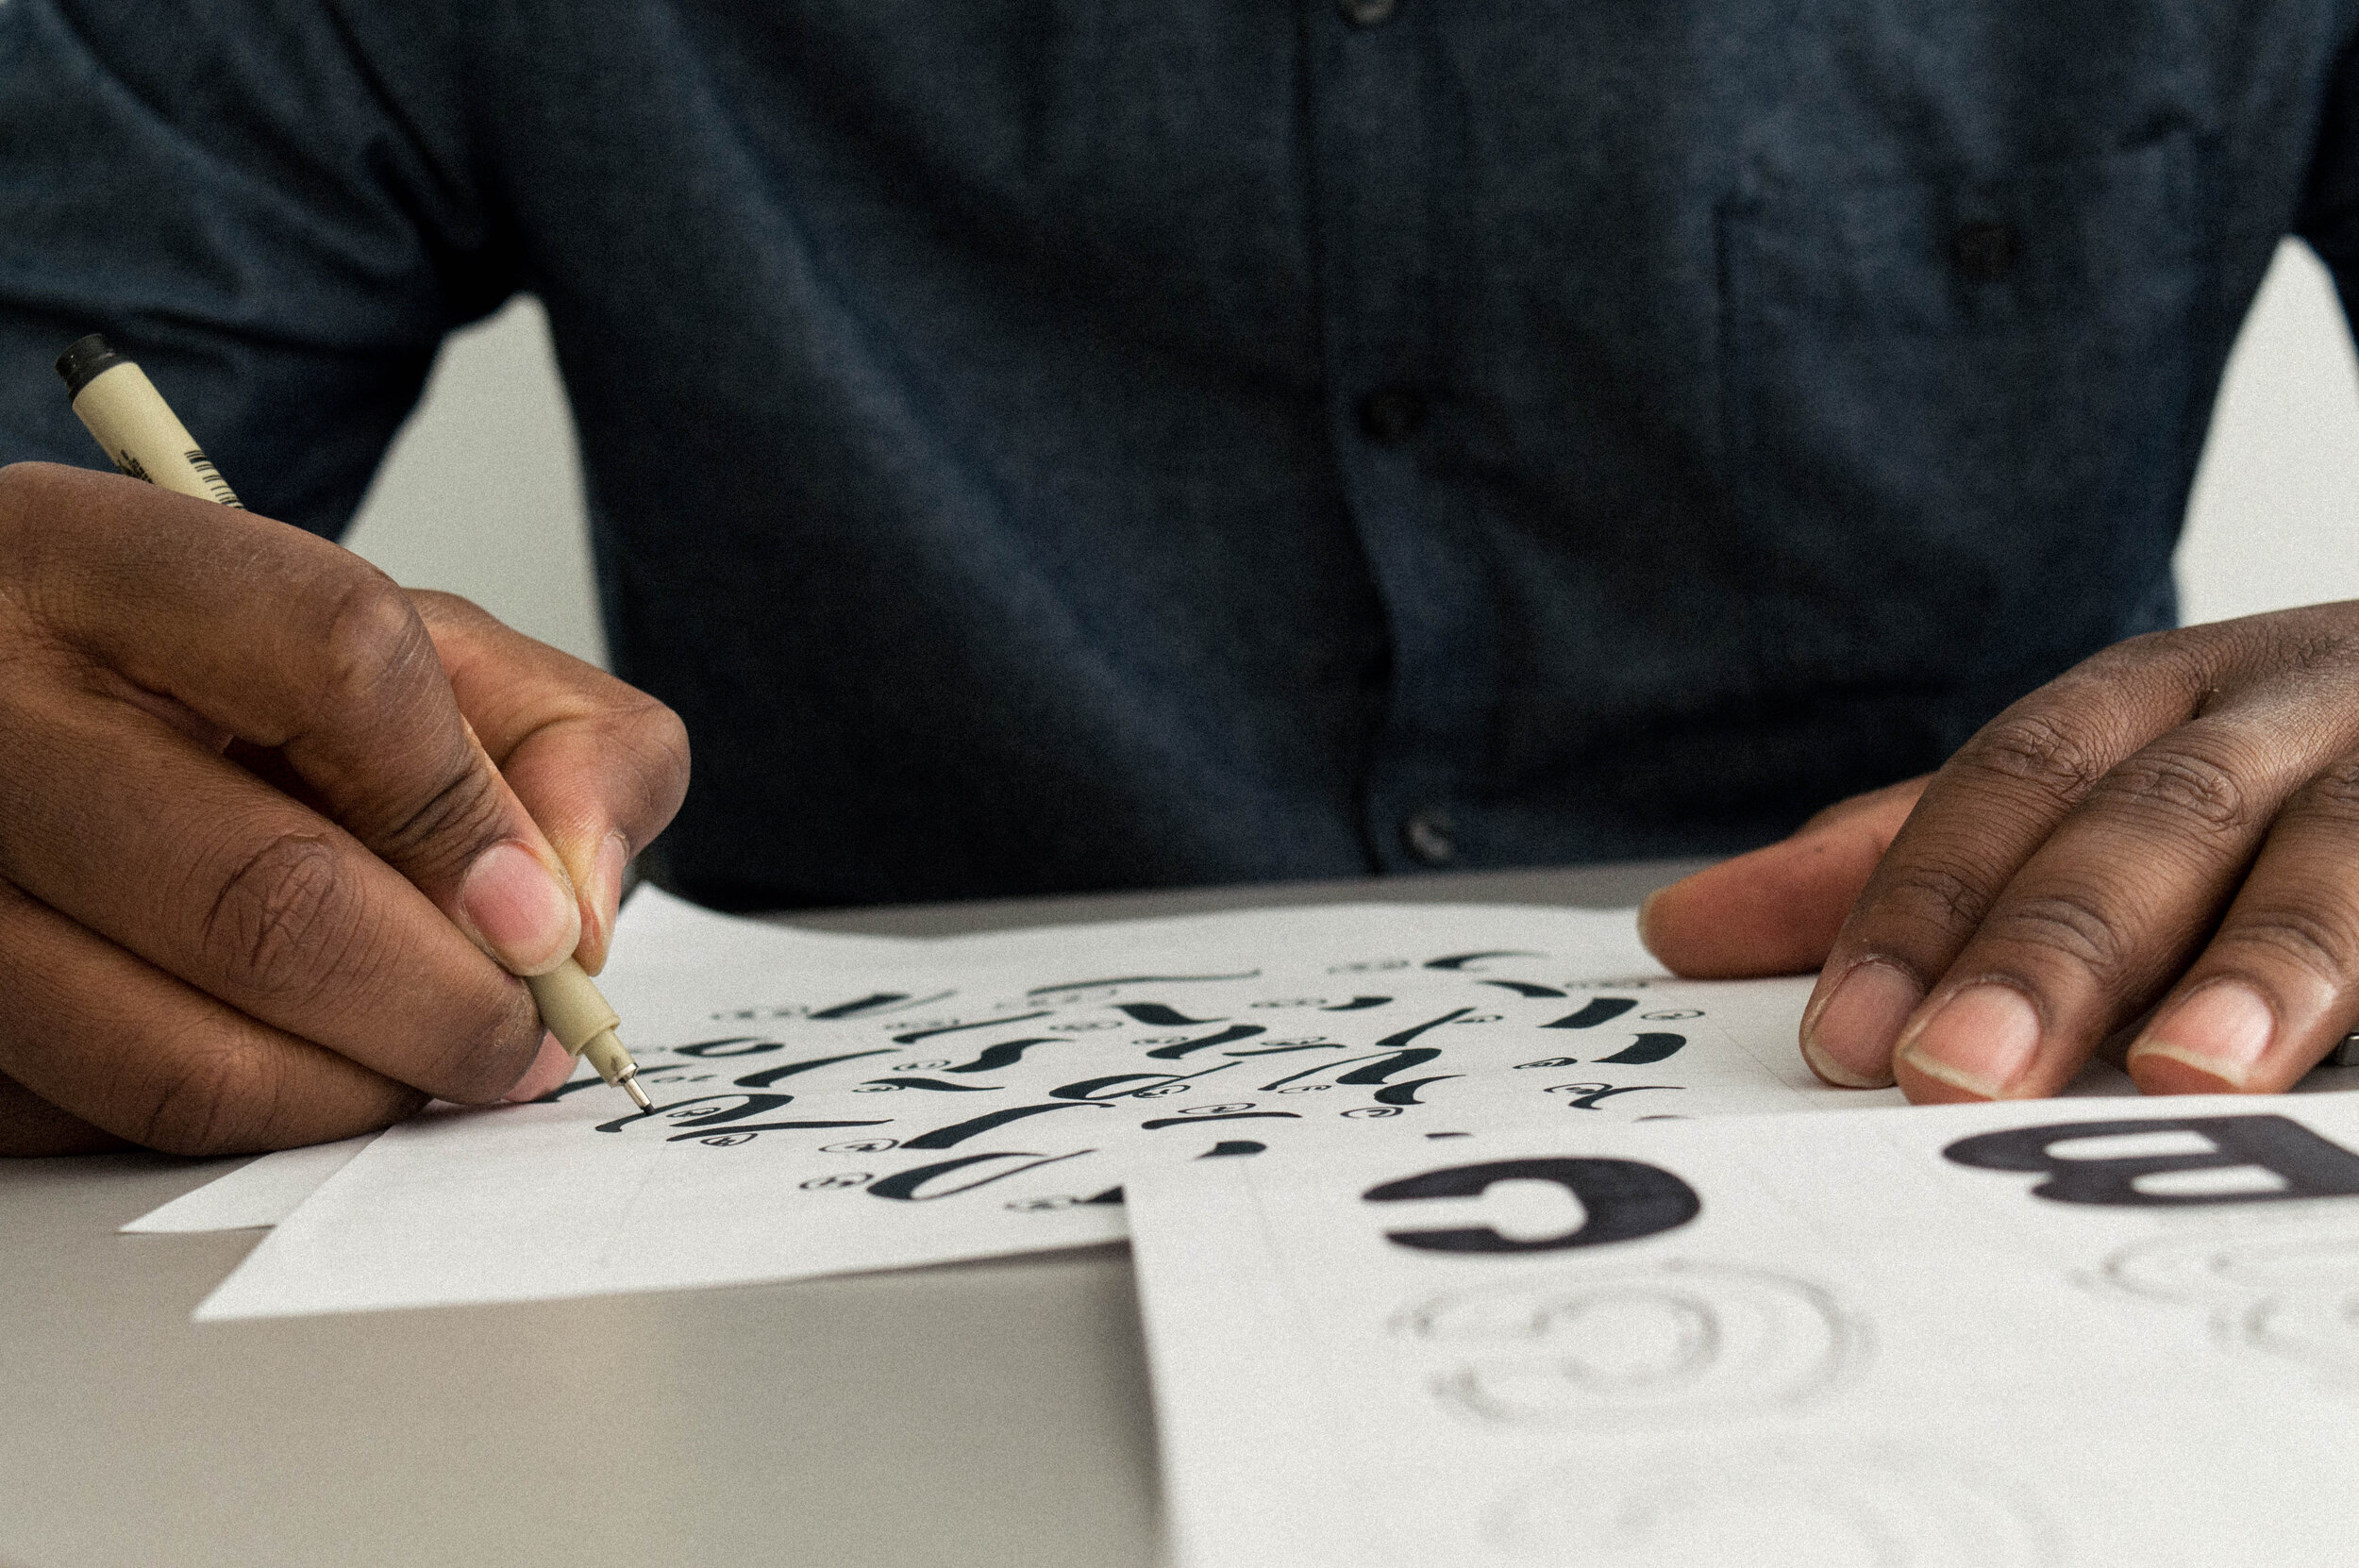
Lettering is a very powerful skill to have. If you can write your name you can letter. Learning lettering will help elevate your creative skills remarkably, giving you a more self expressive style as an artist. Turning your words and thoughts into reality, with each stroke uniquely designed and hand-crafted. If you’re starting out your lettering journey like I did using pencil and paper instead of the iPad, here’s a list of every tool I’ve used and some snap-shots lettering process to get you started. If you’re working strictly in procreate on the iPad I have something for you too.
So, here’s the deal:
Lettering is trendy now so everyone wants to jump on the wagon, but there no need to fight, there’s plenty of room. Truth is, the letterers who actually last are the ones who study their craft inside out. But first, here’s a list of materials you’ll need to get started.
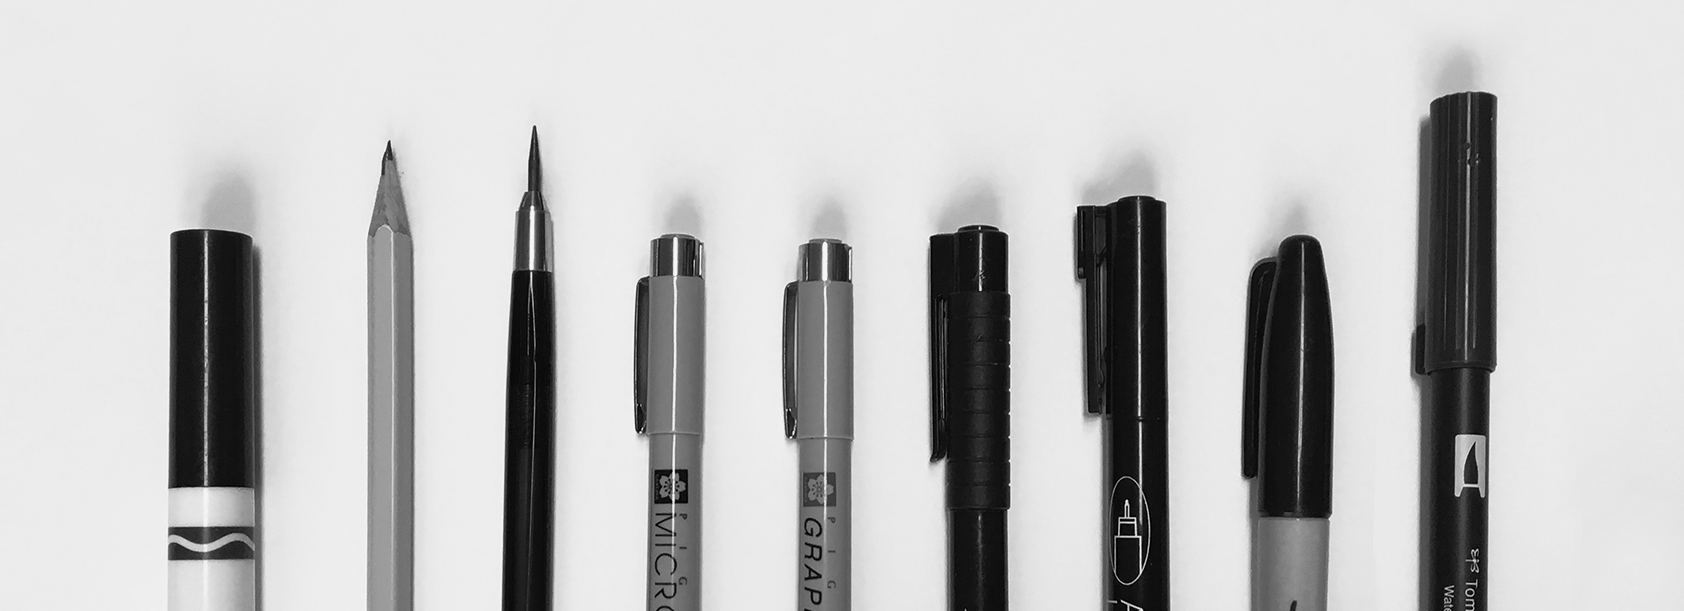
Basic: Recommended for beginners
Pencil - (any kind) I prefer drafting pencils
Pen - Microns (sharpie fine point works if it’s just for practice)
Paper - copy paper (Feel free to experiment with other papers too)
Extended: Recommended for everyone, but not necessary to getting started.
Paper - copy paper, transparent paper.
Pencil - drafting pencil
Pens - microns, faber castell, superior drawing pens, prismacolor premier,
Brushes - sharpie, tombow, crayola markers
Ruler - transparent rulers.
Eraser - art gum eraser (clean drawings great, & and doesn’t harm the paper)
…And of course, lots and lots of PRACTICE. Over time you can introduce different mediums and materials.
Now Lets dive in:

Step 1 & 2. Grid + Sketching
To grid out the placement of your lettering, first map out the overall shape of each word. Then write out the word(s) very lightly using a pencil.

Step 3. Inking
Start with the most interesting part of the drawing, this will allow you to work freely. Then ink in one direction, following the lean of the letter.
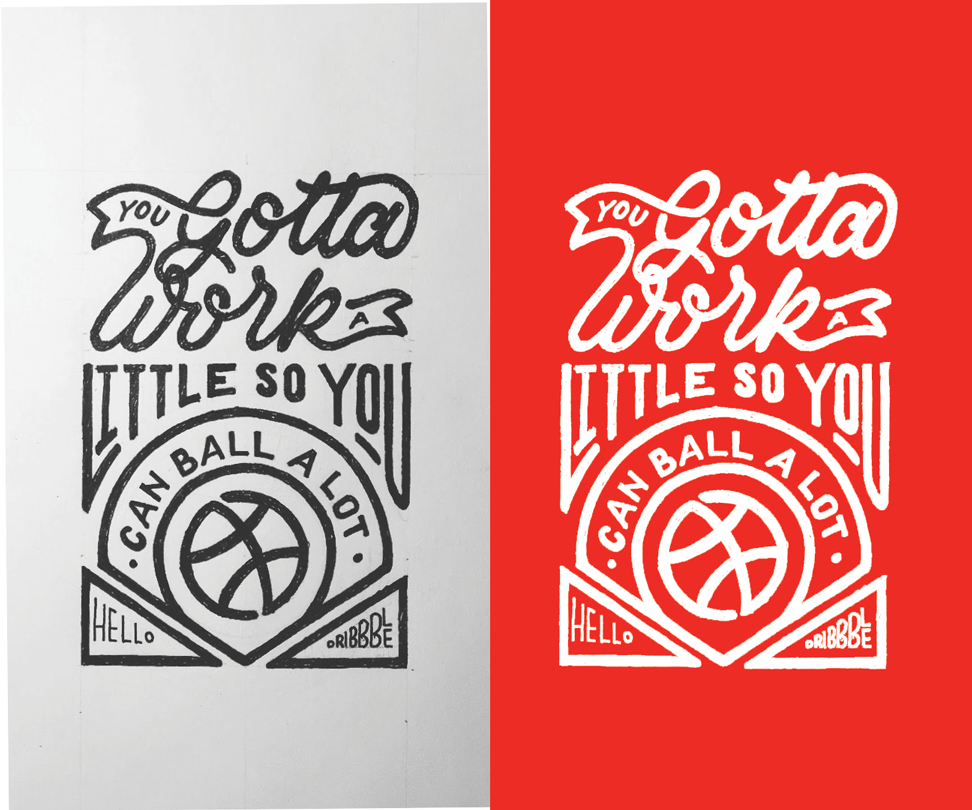
Step 4 & 5. Finished work
Take a picture or scan your final artwork and turn it into a digital drawing in illustrator or photoshop. Then select a color of your choosing.